Using WinBox for 86Box
If you haven't installed WinBox for 86Box yet, you should read this page first.
An IBM™ PC/AT Example
[ Note: For this example, I used "Build 4584" of 86Box (April 29, 2023).
After updating to the latest Build (4636), I found that it caused an error with the PC/AT machine template. If your WinBox for 86Box install is using Build 4636 through 4642 (and likely other later Builds), you will need to replace it for this example. For any other Builds,
should you encounter the same error — as shown further below — I recommend replacing all the 86Box emulator files (but not the rom folder)
in: Documents\WinBox for 86Box\Emulator Files\
with the files in 86Box-Windows-32-b4584.zip on this page.[1] (There is a 64-bit version, but even the authors of 86Box
recommend using the 32-bit version.) ]
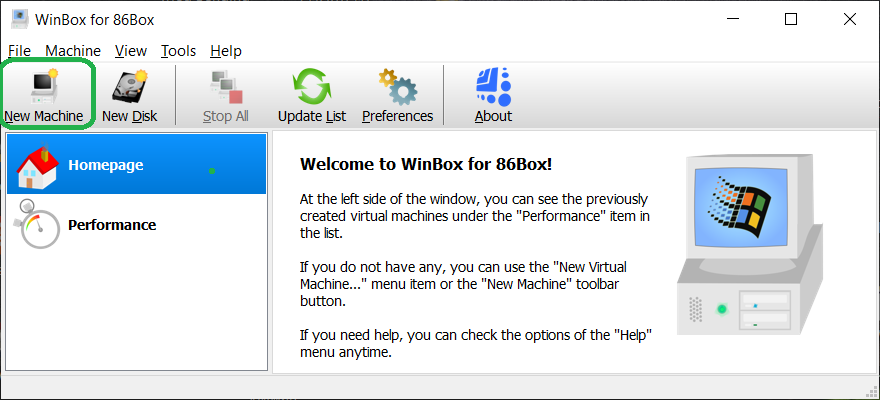
Open WinBox for 86Box and click on the New Machine item in the menu area:
You should now see: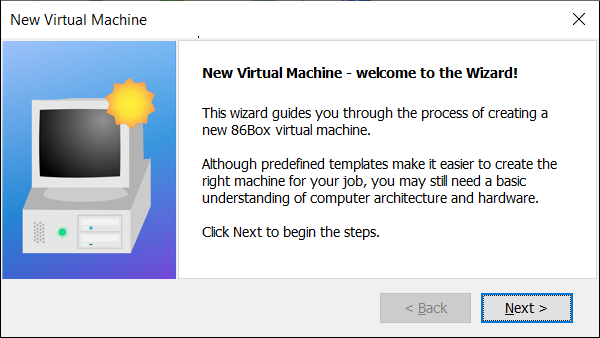
WinBox assigns a random GUID
ID and folder with that name to each new VM it creates. You can change what's in the "New Virtual Machine #1" box to a more descriptive name. For this example, I'll
choose "IBM PC/AT 85"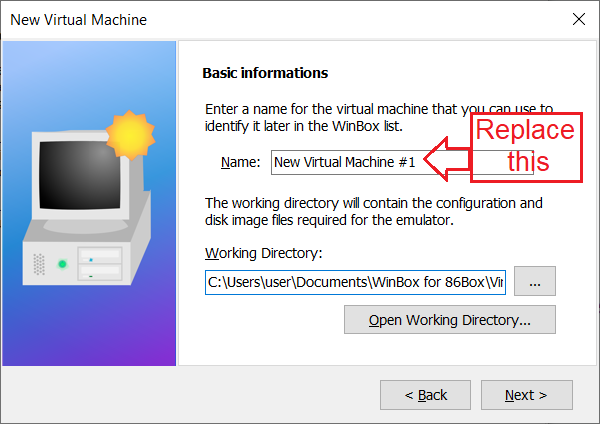
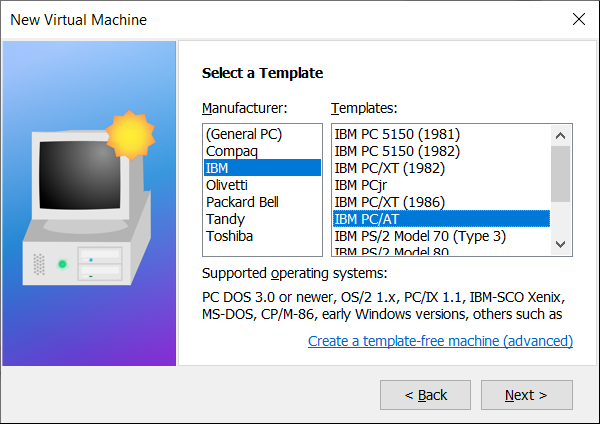
In the "Select a Template" window which appears
next, choose "IBM" and "IBM PC/AT" as shown below:
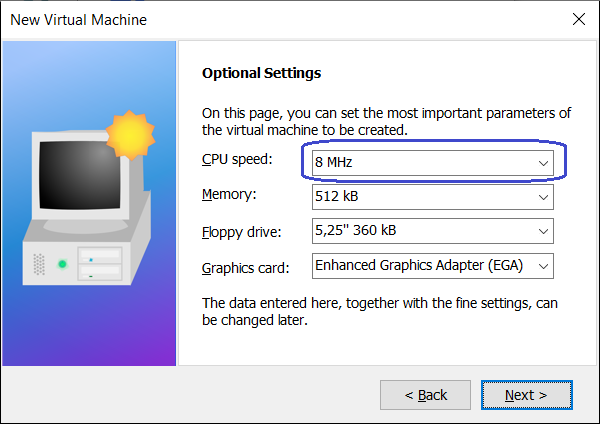
And other than swtiching the "CPU speed" from 6 to "8 MHz" leave the other
Optional settings as they are:
As well as these HDD settings: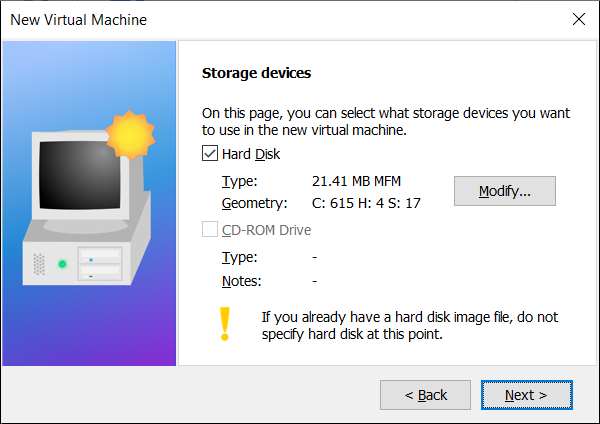
There is no need at this time
to check the "more Settings" box; leave it UN-checked: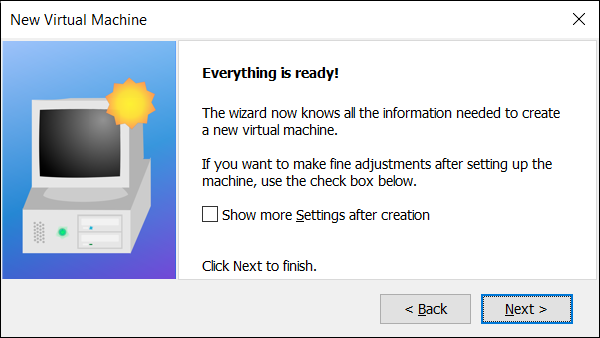
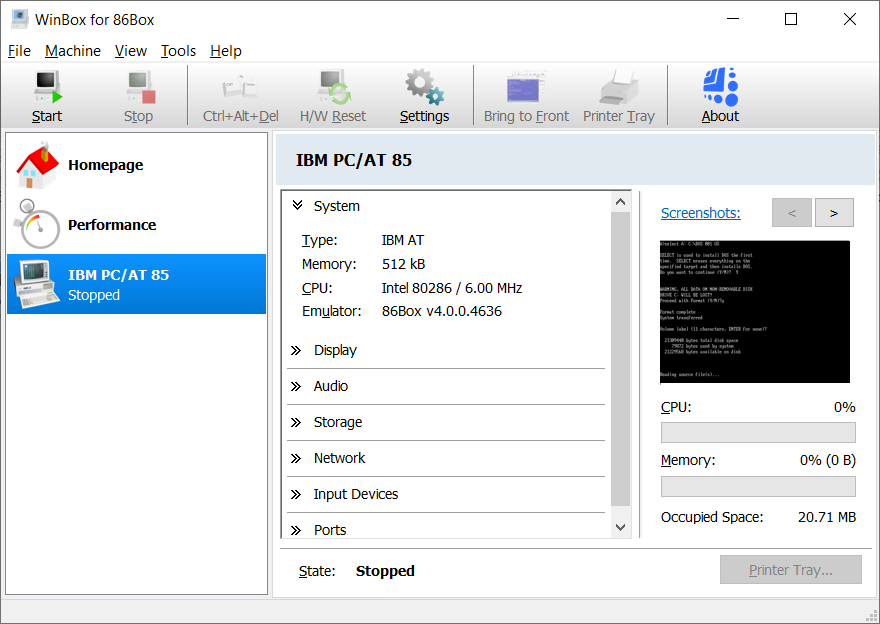
And in the next window you should see:
NOTE: If you happen to click your mouse cursor while it's over the emulator window, to get it back outside, you must press both the F8 and F12 Keys at the same time! Or, if you have a Center Mouse Button, clicking on that may also work. (Note: Unlike some other emulators, the cursor does not need to be inside an 86Box window in order to ENTER data via the Keyboard; keyboard presses are automatically captured by the VM.)
Now click on the "Start" icon and the window that pops-up will first go through a Memory test of the VM's 512 KiB of Memory, and then show the
following:
Before proceeding, I need to point out that whenever you "Start" an existing VM, the window that pops-up and the code running
it is that of 86Box; not WinBox. If you're interested in any particular details of what you see next, the 86Box Documentation is located here.
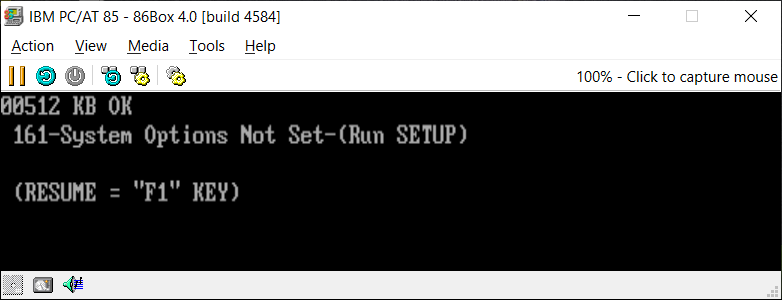
This message shows that an IBM PC/AT computer requires a
"SETUP" diskette in order to initialize its CMOS Memory contents; unlike later PC Clones which included such routines in their BIOS code!
[ If instead you see a "103-System Board Error" message on the screen, refer to the instructions above for downloading
and manually installing the 86Box "Build 4584" files, and then start the "IBM PC/AT 85" VM again. ]
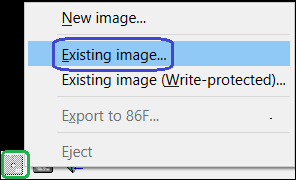
Leave the 86Box window open. Now download the IBM SETUP diskette from: Diagnostics [diskette] for the IBM Personal Computer AT. Extract the file, ATAD_207.IMG, from that Zip file into some folder nearby
(for example, your ...\Documents\WinBox for 86Box\Virtual Machines folder), then click on the empty 5.25-inch diskette icon, circled in GREEN in the
lower left corner of the screen shown below, choose "Existing image..." and lastly navigate to wherever you extracted the ATAD_207.IMG file and select it:
The floppy disk icon will then turn RED and show its contents when you hover the mouse cursor over it:

Press the F1 Key to resume booting from this diskette image, and you should now see:
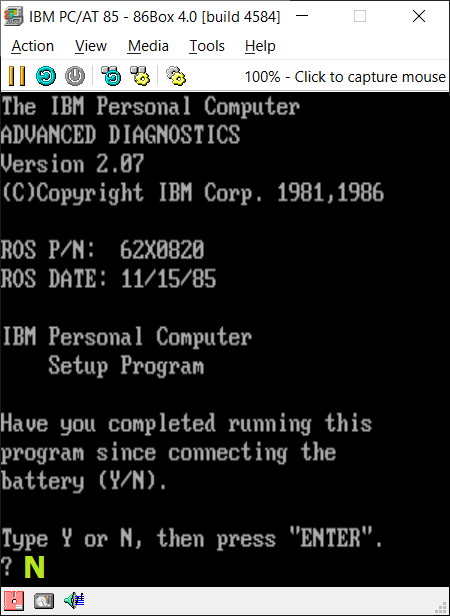
This reveals that the 86Box template for our PC/AT machine uses the latest BIOS code available (15 NOV 1985; ROS
= Read Only Storage, known as ROM outside of IBM at this time). Answer the question by ENTERing N (for No), and continue through the next few screens for setting up
the date and time and diskette configuration, followed by the number of fixed disk drives installed; which is 1 for this VM. The next screen is
important: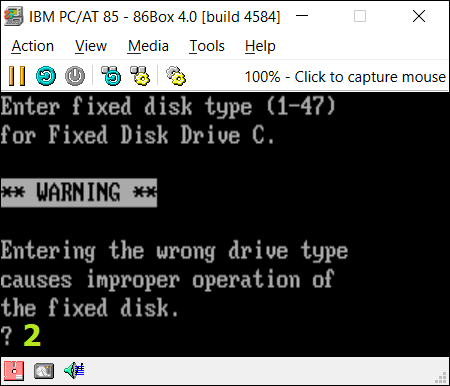
The Disk Type for our 615 Cylinders, 4 Heads and 17 Sectors disk drive is: Type 2 — its parameters provide for: 615 cylinders (the dimensions for "cylinders" in this equation are: tracks/head) x 4 heads x 17
sectors/track (SPT) x 512 bytes/sector = 21,411,840 bytes or 20,910 KiB; or about 20.42 MiB).[2]
And the final screen for setting up
your PC/AT VM should be:
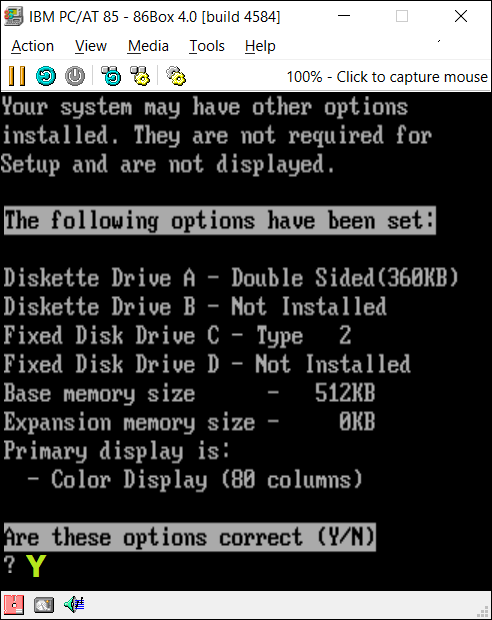
If everything appears as above, then ENTER a "Y" (or y).
IBM™ PC/AT's Built-In ROM BASIC Interpreter
Before moving on, we'll take a quick look at the fact that all IBM PCs included a quite versatile
BASIC Language interpreter (stored in its ROM chips) which was immediately available to users when no operating system was found. Restart the VM without any diskette image in its
floppy drive, and you should see IBM BASIC's editor window pop-up. The code lines (100 - 500) are what I wrote in BASIC to show the same "BIOS Release Date" that we saw
in the first Diagnostics window above: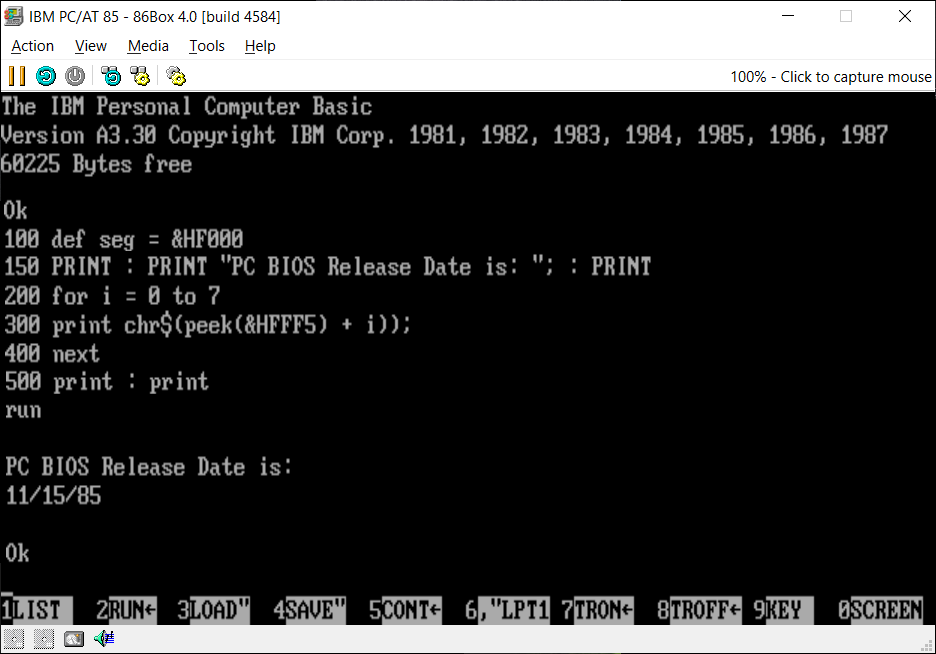
Note that you can enter
almost everything (such as all the BASIC commands) in lower-case and BASIC will convert them to upper-case if you LIST your program lines.
Using DEBUG on an IBM™ PC/AT's ROS Chips
First, download PC-DOS 3.30 on 5.25-inch (360 KiB) diskette image files into a Directory (Folder)
you can easily navigate to from within 86Box: Many sources exist on the Net, but I recommend using these two image files from archive.org, which I've verified as copies of the
original diskettes.[3] Download the:
IBM PC-DOS 3.30
(Startup Diskette)[4] and the IBM PC-DOS 3.30 (Operating
Diskette); Download Page is here. ALL sources should be verified with the checksums below before using
them! The file extension may be .img or .flp or something else on different web sites. The image files, IBM330_1.IMA (also known as "Startup.IMA") and IBM330_2.IMA (also known as "Operating.IMA") should have the following checksums (hashes):
IBM330_1.IMA SHA256: 402efc0f1a4895215cdfdbf851ec678a539a6a929a9c729c43b433970536b432
IBM330_2.IMA SHA256: 9a6df0045954aeb44e07fa501ca2913573e3651d9873b86140fb2ddfed758d88
IBM330_1.IMA MD5: 12dd70c60e57ce97b4e5aabd0f05c71a
IBM330_2.IMA MD5: 2e1ec52cc9cdbf8d93f9fabf27aafe51
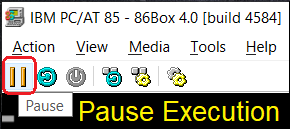
Start your IBM PC/AT VM, but at any time before it finishes the Memory test be sure to click on the "Pause" icon:
Then insert the IBM330_1.IMA image file into the floppy disk drive as you did for the ATAD
file above and resume execution by clicking on the "Resume" Arrow icon: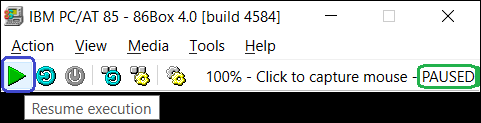
After a while, you should
see the current date appear, since you already set that up in the CMOS memory. Simply press the ENTER Key to retain the current date! The time is a different matter, but you can
sync it to your host PC by using the menus: Tools —> Settings —> and in the general
Machine settings, enable Local Time: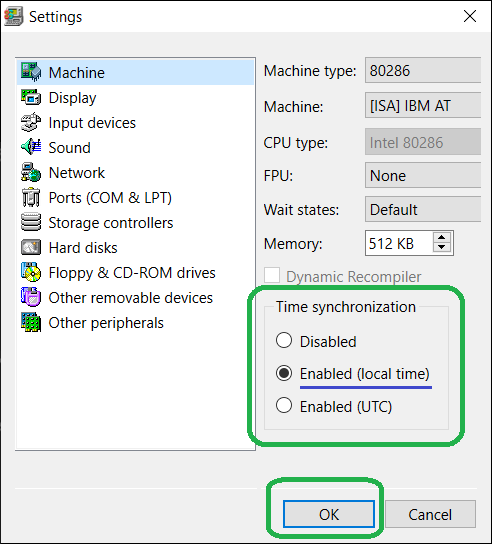
However, note: If you need to make any changes using the IBM Advanced
Diagnostics diskette (ATAD) again, you will need to disable this setting in order to use that diskette image!
After ENTERING "dir /w"
you should see: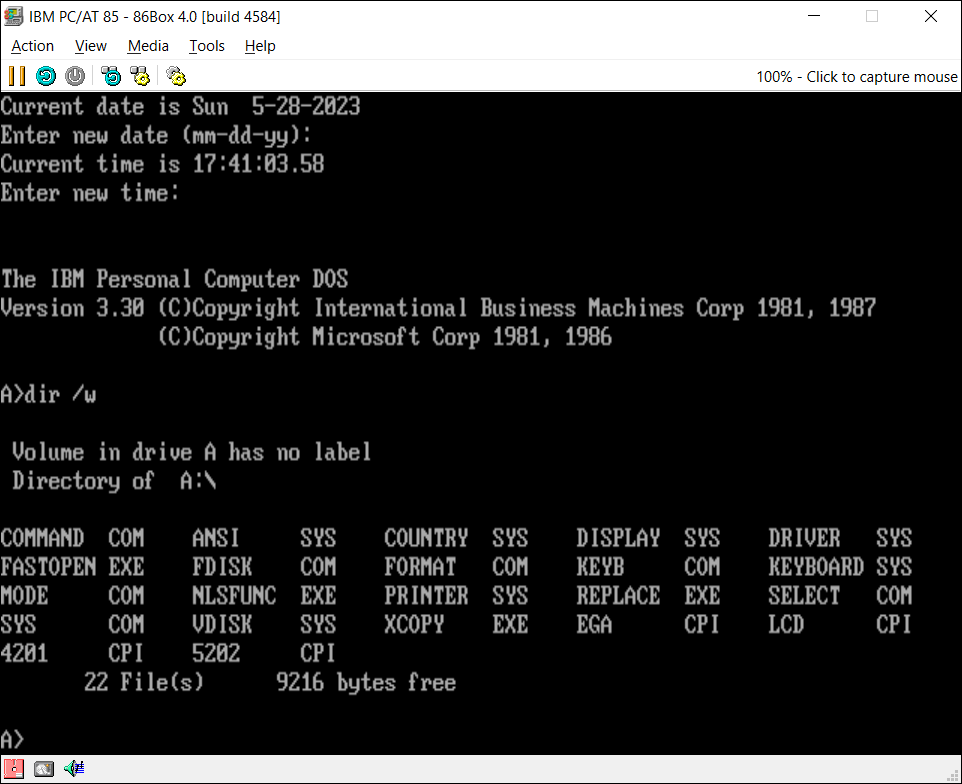
Only the "Startup" diskette (IBM330_1.IMA) is bootable, but we
need to access a program on the "Operating" diskette, so replace the image file in the A: drive with IBM330_2.IMA, and ENTER
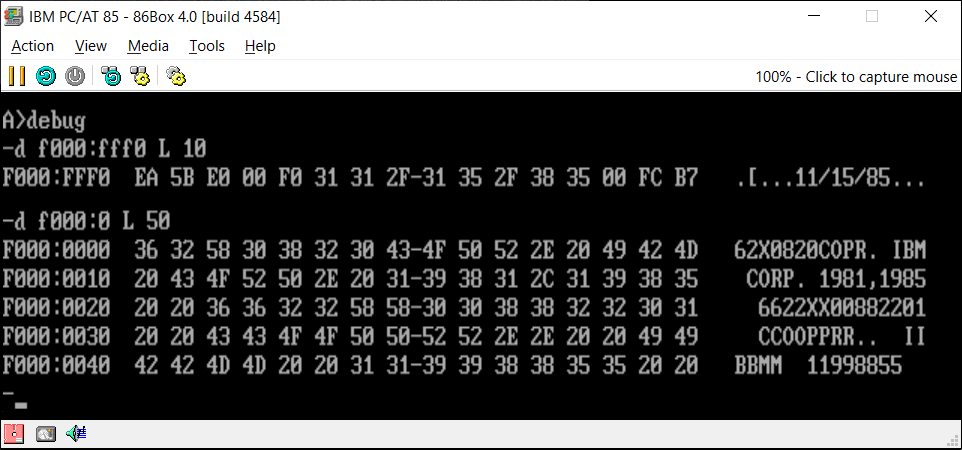
debug at the prompt. At the DEBUG prompt (-), ENTER: d f000:fff0 L 10 (although the "L 10" is not necessary
here, since it's the last line of the Segment, I've added it for consistency) and you should see the last line of bytes in the BIOS code with the RELEASE DATE of "11/15/85".
Next, ENTER: d f000:0000 L 50 to see the first 80 bytes of the BIOS code (which is 64 KiB in length;
0x50 = 80 bytes, and zero to 0xFFFF of the 0xF000 Segment = 65,536 bytes). Note the doubling of the characters in the 3rd through 5th lines here! This is
because we are looking at a combination of both the "Even" (or "Low") and "Odd" (or "High") physical BIOS chips:
A physical BIOS chip (in socket U27 on a Type 3 IBM PC/AT motherboard) with IBM Part Number "62X0820" printed on the chip, contains only these beginning bytes:
Offset(h) 00 01 02 03 04 05 06 07 08 09 0A 0B 0C 0D 0E 0F
00000000  36 58 38 30 4F 52 20 42 20 4F 50 20 39 31 31 38   6X80OR B OP 9118
00000010  20 36 32 58 30 38 32 30 20 43 4F 50 52 2E 20 49    62X0820 COPR. I
00000020  42 4D 20 31 39 38 35                              BM 1985
That chip is also referred to as the the one with the "Even" (or "Low") bytes and the other physical chip (in socket U47 of that motherboard) with IBM Part Number "62X0821" printed on it as containg the "Odd" (or "High") bytes, which begin as:
Offset(h) 00 01 02 03 04 05 06 07 08 09 0A 0B 0C 0D 0E 0F
00000000  32 30 32 43 50 2E 49 4D 43 52 2E 31 38 2C 39 35   202CP.IMCR.18,95
00000010  20 36 32 58 30 38 32 31 20 43 4F 50 52 2E 20 49    62X0821 COPR. I
00000020  42 4D 20 31 39 38 35                              BM 1985
Do some research and see if you can answer the question: "Why was this BIOS code split into alternating 8-bit bytes on two different chips?"
For Extra Credit (or for "Old Timers" wishing to relive early DOS days)
Installing IBM PC-DOS 3.30 on a PC/AT Disk Drive
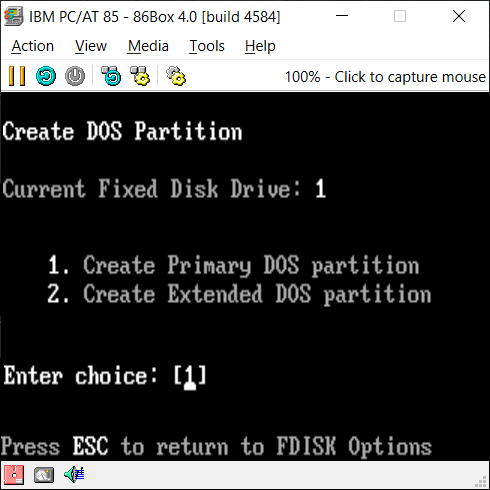
With the "Startup" diskette (IBM330_1.IMA) in the A: drive, ENTER
fdisk at the command prompt, and you should eventually see:
All of the default choices
are correct, so you'll basically just press the ENTER Key for each window!
The steps are:
1) 1. Create DOS partition (as shown above),
2) 1. Create Primary DOS partition,
3) and answer Y to the question,
4) Then press ENTER one last time to restart:
 |  |  |
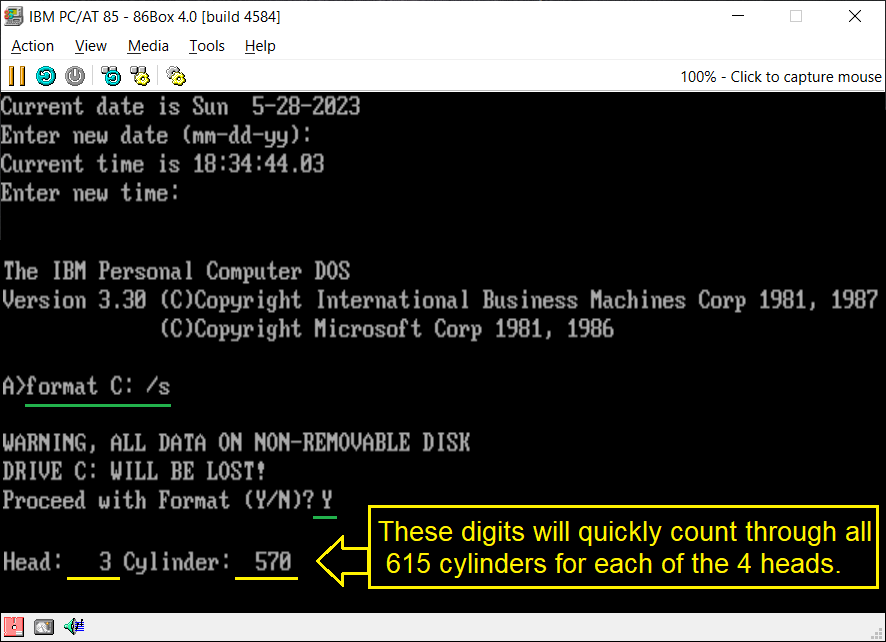
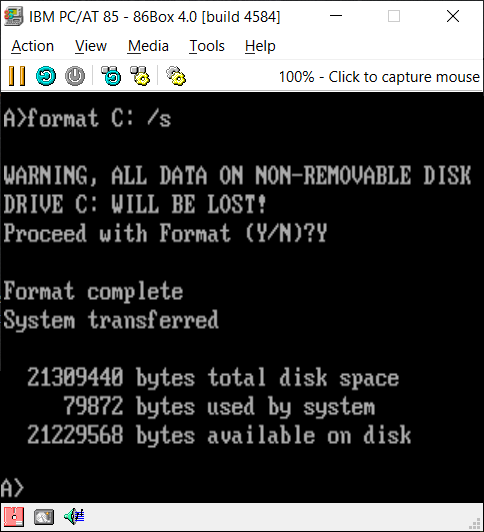
After restarting, you'll still need to format the drive and transfer the DOS system files to it.
Both can be done using this single
command: format C: /s
[ If you attempt to SYS the disk before formatting, DOS will display this misguided (if not somewhat cryptic) error
message:
"No room for system on destination disk" when it should simply state the disk has not been formatted yet.]
 |  |
Now comes the task of copying all the
DOS files to the hard disk; no automatic setup programs back then! Here are the steps I used:
1) Create a DOS folder/directory on the disk using: md c:\dos (or mkdir c:\dos),
2) Copy all the files from Startup disk to there using:
copy *.* c:\dos, then
3) Replace the Startup diskette with "IBM330_2.IMA" (Operating diskette), and use the same command again since COPY is
built into the COMMAND.COM program already running.
4) Now comes the tricky part: Creating an AUTOEXEC.BAT file with two lines; well, three if you count an added line feed at
the end of the file. If you're looking for something that will surely frustrate you, try figuring out how to do this with the EDLIN.COM editor! But there's a
much easier way, provided you don't make any mistakes: At the command prompt, ENTER: copy con autoexec.bat, and on the next line, ENTER:
@echo off, and on the next line: PATH=C:\DOS
After pressing the ENTER Key, so there's a blank line, press the CTRL and then Z keys before releasing both, and another ENTER. You should see the message: 1 File(s) copied.
Now when you reboot your VM, you'll have access to all the files in the C:\DOS directory at any command prompt.
Next 86Box VM Example: NEAT BIOS
Note: If you need help setting up a particular Virtual Machine, you can contact me here for help.
Footnotes
1[Return to Text] When starting a PC with this error, you will never see a Memory test, it will immediately display this error message: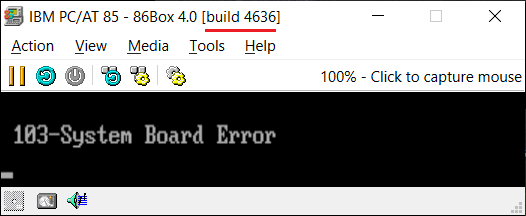
After replacing the 86Box files with those from Build 4584, the directory (folder) should appear as follows:
Once you have replaced the broken 86Box emulator files, I'd recommend going into the "Tools" menu and select "Program Settings..." Then under the "Automatic Updates" TAB, disable the
"Search for Emulator Updates automatically" as shown in the BROWN annotation on this photo
("UN-check" that box! and click on OK).
[Return to Text]
2[Return to Text] Although the terms we use for magnetic storage device capacities did have a direct correspondence to their physical attributes at one time; and still do for what we called floppy disks, where the magnetic medium has only two surfaces at most (so a maximum of 2 sides), and concentric rings on either side of the medium called tracks, generally comprised of 512-byte sectors, that has not been true for hard disk drives for many decades. So, a floppy’s capacity is computed by: 1 or 2 sides x tracks/side x sectors/track x bytes/sector. Early hard disks, which had already been created two decades before the first PC, used multiple platters, and the term heads rather than sides came from the combination of all the sides of the many platters. Thus the dimensions for computing the capacity of an early disk drive were: heads x tracks/head x sectors/track x bytes/sector, and each of those terms was directly related to some physical aspect of the drive's structure. It must be noted here that the term cylinders is equivalent to "tracks/head" in that equation. To make it a bit clearer, the number of sectors in a disk drive can be found using this equation:
heads x tracks/head (cylinders) x sectors/track = Total Sectors
However, by the time only 20 MiB disk drives started to become popular in IBM PCs, a conflict was already brewing: Disk drive manufacturers made a rather reasonable decision when constructing new IDE (Integrated Drive Electronics) drive controllers under what came to be called ATA-1 in 1986, to limit the number of Heads to 16 (who would ever use more than 8 platters in a drive for a PC, right? Counting from 0 to 15), the number of Sectors/Track to 255 and the number of Cylinders (or Tracks per surface) to 65,536 (counting from 0 to 65,535). That allowed for 267,386,880 Sectors (or 136,902,082,560 bytes; 127 GiB of storage). But IBM; not Microsoft, specifically whomever made the final decision to use the limited C/H/S values of only 1024 cylinders, 255 heads (crazy) and only 63 sectors, in the PC’s BIOS code (loosely based upon the existing BIOS Interrupts for floppy drives) created what later became a big problem for PC users and the industry. Why? Because the BIOS, OS and disk drive controllers all needed to communicate with each other using the smallest common maximum allowable values in each case, which was the 1024 cylinders and 63 sectors of IBM, and the 16 heads of the ATA-1 standard, meaning that the PC's BIOS could never access more than 1024 x 63 x 16 = 1,032,192 sectors, or 528,482,304 bytes (504 MiB). When disk capacities exceeded that, drive manufacturers had to include special software installed (and hidden) at the first sector and following for accessing the full capacity of their drives!
3[Return to Text] 21 years ago now, I had access to some original physical IBM PC-DOS 3.30 diskettes and wrote in an email dated May 04, 2002, that I'd hashed the contents of the whole "Startup" diskette as a MD5 checksum of: 12dd70c60e57ce97b4e5aabd0f05c71a; which is the same exact value for the image file I recently downloaded from archive.org. In that email, I also mentioned the diskette contained the Hidden zero-length file: VENDOR-#.DO1 (07-04-83 12:00a) and that the files, 4201.CPI, EGA.CPI, FDISK.COM, FORMAT.COM and IBMBIO.COM were dated: 03-18-87 12:00p (whereas all the other files were dated: 03-17-87 12:00p). And in another email dated April 28, 2002, I mentioned the MD5 checksum for the "Operating" diskette was: 2e1ec52cc9cdbf8d93f9fabf27aafe51. Thus the reasonat I can state these two image files at archive.org are identical to the original contents.
4[Return to Text] In fact, I did quite a bit of the file hashing and correcting of the checksums for the dead website 16bitos.com. You can, however, still see its pages at archive.org, such as this one for IBM PC DOS 3.30; which includes photos of the diskette labels. There's also a very nice clear photo of the Startup diskette label on archive.org's IBM PC-DOS 3.30 Details page.